Integrate your library with the Hub
The Hugging Face Hub aims to facilitate sharing machine learning models, checkpoints, and artifacts. This endeavor includes integrating the Hub into many of the amazing third-party libraries in the community. Some of the ones already integrated include spaCy, Sentence Transformers, OpenCLIP, and timm, among many others. Integration means users can download and upload files to the Hub directly from your library. We hope you will integrate your library and join us in democratizing artificial intelligence for everyone.
Integrating the Hub with your library provides many benefits, including:
- Free model hosting for you and your users.
- Built-in file versioning - even for huge files - made possible by Git-LFS.
- Community features (discussions, pull requests, likes).
- Usage metrics for all models ran with your library.
This tutorial will help you integrate the Hub into your library so your users can benefit from all the features offered by the Hub.
Before you begin, we recommend you create a Hugging Face account from which you can manage your repositories and files.
If you need help with the integration, feel free to open an issue, and we would be more than happy to help you.
Implementation
Implementing an integration of a library with the Hub often means providing built-in methods to load models from the Hub and allow users to push new models to the Hub. This section will cover the basics of how to do that using the huggingface_hub library. For more in-depth guidance, check out this guide.
Installation
To integrate your library with the Hub, you will need to add huggingface_hub library as a dependency:
pip install huggingface_hub
For more details about huggingface_hub installation, check out this guide.
In this guide, we will focus on Python libraries. If you’ve implemented your library in JavaScript, you can use @huggingface/hub instead. The rest of the logic (i.e. hosting files, code samples, etc.) does not depend on the code language.
npm add @huggingface/hubUsers will need to authenticate once they have successfully installed the huggingface_hub library. The easiest way to authenticate is to save the token on the machine. Users can do that from the terminal using the login() command:
huggingface-cli loginThe command tells them if they are already logged in and prompts them for their token. The token is then validated and saved in their HF_HOME directory (defaults to ~/.cache/huggingface/token). Any script or library interacting with the Hub will use this token when sending requests.
Alternatively, users can programmatically login using login() in a notebook or a script:
from huggingface_hub import login
login()
Authentication is optional when downloading files from public repos on the Hub.
Download files from the Hub
Integrations allow users to download a model from the Hub and instantiate it directly from your library. This is often made possible by providing a method (usually called from_pretrained or load_from_hf) that has to be specific to your library. To instantiate a model from the Hub, your library has to:
- download files from the Hub. This is what we will discuss now.
- instantiate the Python model from these files.
Use the hf_hub_download method to download files from a repository on the Hub. Downloaded files are stored in the cache: ~/.cache/huggingface/hub. Users won’t have to re-download the file the next time they use it, which saves a lot of time for large files. Furthermore, if the repository is updated with a new version of the file, huggingface_hub will automatically download the latest version and store it in the cache. Users don’t have to worry about updating their files manually.
For example, download the config.json file from the lysandre/arxiv-nlp repository:
>>> from huggingface_hub import hf_hub_download
>>> config_path = hf_hub_download(repo_id="lysandre/arxiv-nlp", filename="config.json")
>>> config_path
'/home/lysandre/.cache/huggingface/hub/models--lysandre--arxiv-nlp/snapshots/894a9adde21d9a3e3843e6d5aeaaf01875c7fade/config.json'
config_path now contains a path to the downloaded file. You are guaranteed that the file exists and is up-to-date.
If your library needs to download an entire repository, use snapshot_download. It will take care of downloading all the files in parallel. The return value is a path to the directory containing the downloaded files.
>>> from huggingface_hub import snapshot_download
>>> snapshot_download(repo_id="lysandre/arxiv-nlp")
'/home/lysandre/.cache/huggingface/hub/models--lysandre--arxiv-nlp/snapshots/894a9adde21d9a3e3843e6d5aeaaf01875c7fade'
Many options exists to download files from a specific revision, to filter which files to download, to provide a custom cache directory, to download to a local directory, etc. Check out the download guide for more details.
Upload files to the Hub
You might also want to provide a method so that users can push their own models to the Hub. This allows the community to build an ecosystem of models compatible with your library. The huggingface_hub library offers methods to create repositories and upload files:
create_repocreates a repository on the Hub.upload_fileandupload_folderupload files to a repository on the Hub.
The create_repo method creates a repository on the Hub. Use the repo_id parameter to provide a name for your repository:
>>> from huggingface_hub import create_repo
>>> create_repo(repo_id="test-model")
'https://huggingface.co/lysandre/test-model'
When you check your Hugging Face account, you should now see a test-model repository under your namespace.
The upload_file method uploads a file to the Hub. This method requires the following:
- A path to the file to upload.
- The final path in the repository.
- The repository you wish to push the files to.
For example:
>>> from huggingface_hub import upload_file
>>> upload_file(
...    path_or_fileobj="/home/lysandre/dummy-test/README.md",
...    path_in_repo="README.md",
...    repo_id="lysandre/test-model"
... )
'https://huggingface.co/lysandre/test-model/blob/main/README.md'
If you check your Hugging Face account, you should see the file inside your repository.
Usually, a library will serialize the model to a local directory and then upload to the Hub the entire folder at once. This can be done using upload_folder:
>>> from huggingface_hub import upload_folder
>>> upload_folder(
...     folder_path="/home/lysandre/dummy-test",
...     repo_id="lysandre/test-model",
... )
For more details about how to upload files, check out the upload guide.
Model cards
Model cards are files that accompany the models and provide handy information. Under the hood, model cards are simple Markdown files with additional metadata. Model cards are essential for discoverability, reproducibility, and sharing! You can find a model card as the README.md file in any model repo. See the model cards guide for more details about how to create a good model card.
If your library allows pushing a model to the Hub, it is recommended to generate a minimal model card with prefilled metadata (typically library_name, pipeline_tag or tags) and information on how the model has been trained. This will help having a standardized description for all models built with your library.
Register your library
Well done! You should now have a library able to load a model from the Hub and eventually push new models. The next step is to make sure that your models on the Hub are well-documented and integrated with the platform. To do so, libraries can be registered on the Hub, which comes with a few benefits for the users:
- a pretty label can be shown on the model page (e.g.
KerasNLPinstead ofkeras-nlp) - a link to your library repository and documentation is added to each model page
- a custom download count rule can be defined
- code snippets can be generated to show how to load the model using your library
To register a new library, please open a Pull Request here following the instructions below:
- The library id should be lowercased and hyphen-separated (example:
"adapter-transformers"). Make sure to preserve alphabetical order when opening the PR. - set
repoNameandprettyLabelwith user-friendly casing (example:DeepForest). - set
repoUrlwith a link to the library source code (usually a GitHub repository). - (optional) set
docsUrlwith a link to the docs of the library. If the documentation is in the GitHub repo referenced above, no need to set it twice. - set
filtertofalse. - (optional) define how downloads must be counted by setting
countDownload. Downloads can be tracked by file extensions or filenames. Make sure to not duplicate the counting. For instance, if loading a model requires 3 files, the download count rule must count downloads only on 1 of the 3 files. Otherwise, the download count will be overestimated. Note: if the library uses one of the default config files (config.json,config.yaml,hyperparams.yaml, andmeta.yaml, see here), there is no need to manually define a download count rule. - (optional) define
snippetsto let the user know how they can quickly instantiate a model. More details below.
Before opening the PR, make sure that at least one model is referenced on https://huggingface.co/models?other=my-library-name. If not, the model card metadata of the relevant models must be updated with library_name: my-library-name (see example). If you are not the owner of the models on the Hub, please open PRs (see example).
Here is a minimal example adding integration for VFIMamba.
Code snippets
We recommend adding a code snippet to explain how to use a model in your downstream library.
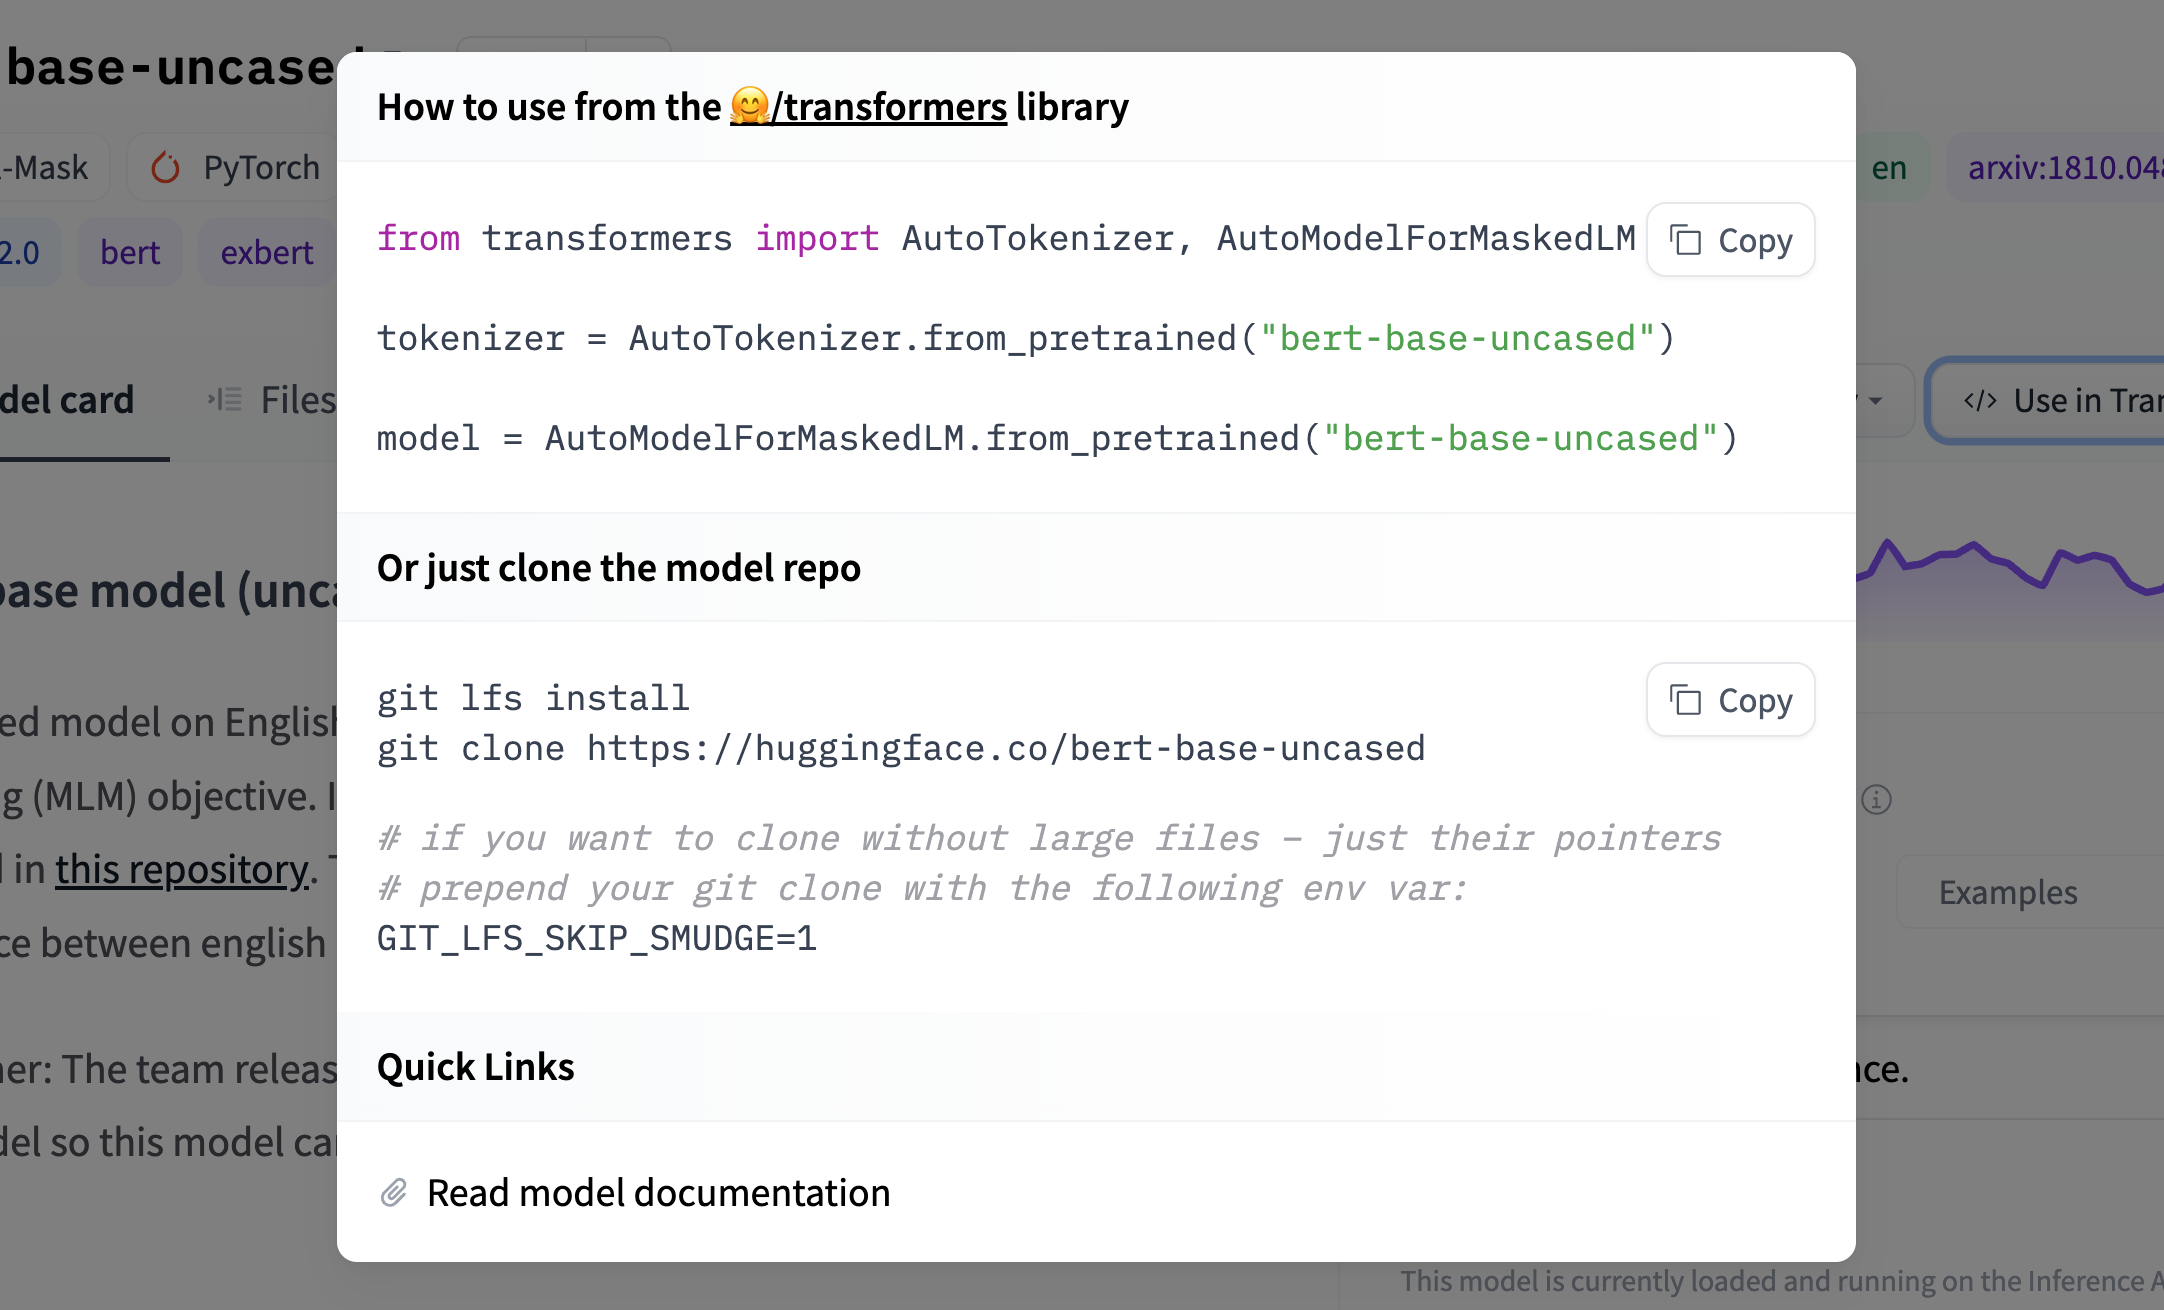
To add a code snippet, you should update the model-libraries-snippets.ts file with instructions for your model. For example, the Asteroid integration includes a brief code snippet for how to load and use an Asteroid model:
const asteroid = (model: ModelData) =>
`from asteroid.models import BaseModel

model = BaseModel.from_pretrained("${model.id}")`;
Doing so will also add a tag to your model so users can quickly identify models from your library.
Once your snippet has been added to model-libraries-snippets.ts, you can reference it in model-libraries.ts as described above.
Document your library
Finally, you can add your library to the Hub’s documentation. Check for example the Setfit PR that added SetFit to the documentation.
< > Update on GitHub